Imagine that you are about to give a presentation that contains a certain number of slides, and you've got 15 minutes in all to complete the
whole presentation and wrap up every detail. All in those 15 minutes! Or maybe, you have only 10 minutes? What will you do?
Did you know that you can set up a small timer in your slides that shows a countdown as you present? Although this can be a little distracting,
you can make it work if you place it discreetly, as we will show you in this tutorial.
We will now show you how you can create a countdown timer using a ready-to-use video file, right within
PowerPoint 2016 or
PowerPoint 2013. To use these techniques, you will have to
download and buy our collection of Countdown Timers 02 (Larger). This entire collection can be bought for a minimum price of $9.99. Once you download this collection, unzip the downloaded folder. Thereafter follow these steps to learn how to
insert a countdown timer in a presentation:
- Once you download this collection, unzip the downloaded folder (see Figure 1). Notice the MP4 video files? You will use one of
these in the countdown sequence you create within this tutorial. Do note that all MP4 files are available in both Standard (4:3) and Widescreen
(16:9) aspect ratios.

Figure 1: Unzipped downloaded folder
- Open your existing presentation (or create a new one) and navigate to the first slide of your presentation, as shown in
Figure 2, below.

Figure 2: First slide of the presentation
Tip: If you are creating a new presentation, then another alternative is to use any of the existing countdown equipped
presentations in the downloaded ZIP (look within the Samples folder). And then use that presentation as a starting point to
create your own slides, already equipped with a countdown! You then don't need to follow any of the other steps mentioned on this page.
- Now, choose the Insert tab of the
Ribbon. Then click the Video button,
shown highlighted in red within Figure 3. From the drop-down menu that appears, select the
Video on My PC option, as shown highlighted in blue within Figure 3.
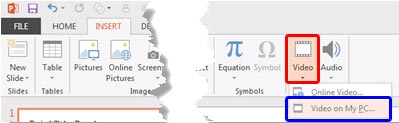
Figure 3: Video on My PC option
- Within the resultant dialog box, browse to the location where you have the countdown timer video saved, and insert it on the slide.
- PowerPoint will embed the video within your first slide. Now, resize and place it at a corner of the slide as shown in
Figure 4, below.

Figure 4: Timer video inserted on the slide
- Now, select the video and within the contextual Video Tools Playback tab, set the Start option to start
Automatically (as shown highlighted in red within
Figure 5).
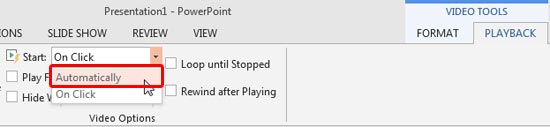
Figure 5: Playback set to start automatically
- Access the Animations tab of the Ribbon. Then click the Animation Pane button, as shown highlighted in
red within Figure 6, below.

Figure 6: Animation Pane button
- Within the Animation Pane that shows up, double-click the first animation. This will bring up the
Play Video dialog box as shown in Figure 7.
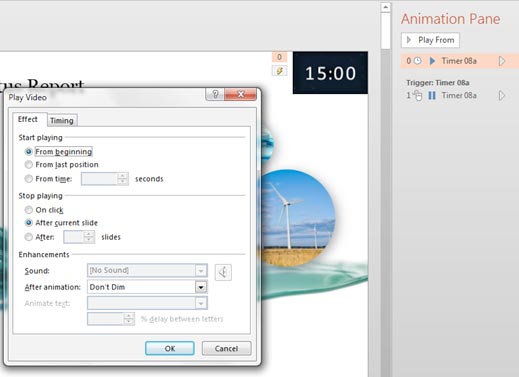
Figure 7: The Effect tab of the Play Video dialog box
- Within the Effect tab of this dialog box, locate the Stop playing section. Then select the
After ____ slides radio button and set the value to 999, as shown highlighted in red within
Figure 8.
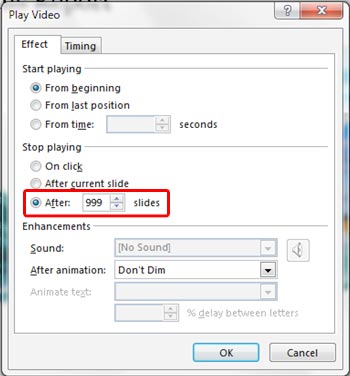
Figure 8: Stop playing after 999 slides
- Once done, click the OK button.
- Save your presentation and preview it in
Slide Show view, beginning from the first slide. Your countdown timer will
continue showing a reduced amount of time as you progress from slide to slide!
Tip: Make sure you place the countdown timer video in a place that it doesn't hide your content and resize the video so it
only shows what you need to see, as shown in
Figure 9.
 Figure 9:
 Countdown timer video properly positioned on the slide and resized
See Also:
Slides with Countdown Timers in PowerPoint 2010 for Windows
Slides with Countdown Timers in PowerPoint 2007 for Windows
