If you've tried the first Spirograph tutorial and thought, "Whoa, this is cool!"—well, buckle up. This version is like a sequel with extra sparkle. Same idea, fresh twists. Think of it like baking another batch of cookies—same dough, new shapes, even tastier results.
Imagine this as your spirograph’s stylish cousin: Both are artistic, but this one shows up to the party with sunglasses and gradient flair. Yes, we now use pictures rather than oval shapes to create this version of a Spirograph. Want to skip the steps and go straight to the eye candy? Download the finished Picture Spirographs here.
Follow these steps to create your own picture spirographs:
- By default, PowerPoint opens up with a blank slide—your digital canvas, fresh and ready. But if it doesn’t? No big deal. Just insert a new slide manually, whether you're starting from scratch or adding to an existing presentation. The shortcut key to insert a new slide is Ctrl + M for Windows users and ⌘ + Shift + N, if you are using a Mac.
-
- Before you turn PowerPoint into your personal art studio, you'll want a slide that’s completely uncluttered. That means no title boxes, no bullet points—just empty space ready for your creativity.
- To achieve this result, click on the Home tab—think of it as PowerPoint’s welcome mat. Click the Layout button, shown highlighted in red within Figure 1, below, to open the Layout gallery. Choose Blank from the list, as shown highlighted in green within Figure 1. This one’s the plain white T-shirt of slides—zero distractions, just clean design potential.
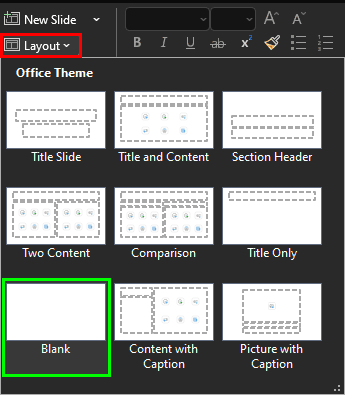
Figure 1: Change Slide Layout to Blank
Blank Layout has no Title
Think of the Blank slide as a digital sketchpad with no lines and no labels—just room to swirl those spirals without bumping into a text box begging for a title. The idea of a “blank canvas” dates back centuries to artists priming their boards before painting. Even Picasso had to start with a bare surface—so you’re in good company.
Sure, that Blank layout in PowerPoint is like the rebel of the slide family—no title, no placeholders, just a wide-open dance floor. But here's a little secret: even when you don't want a title box cramping your design, it's still smart to include a title behind the scenes. Yes, there is merit in all slides having a title, especially for accessibility reasons, even if it is not visible on the slide itself. To know more, read our Hiding Slide Titles in PowerPoint tutorial.
- Now, select the Insert tab of the Ribbon. Next, choose the Pictures | Stock Images option, as shown highlighted in red within Figure 2, below. Think of this as browsing PowerPoint’s photo buffet—tons of crisp, high-quality pics ready to dress up your slides.

Figure 2: Insert a graphic in PowerPoint- Once you click on Stock Images, get ready for a pop-up box that feels like walking into PowerPoint’s art supply closet—the Stock Images dialog box springs into action, as shown in Figure 3, below.

Figure 3: Stock Images dialog box- Here’s how to zero in on the perfect picture:
- Select the Images tab, highlighted in red within Figure 3, above. This is kind of like flipping to the right chapter in a photo encyclopedia.
- Type your keyword in the Search box, highlighted in green. We typed ‘apple.’ Think of this as whispering to a helpful visual librarian: “Got any cool apples?”—and voilà, they appear.
- Look for something simple and clean—like we did. We picked a picture of an apple on a white background, as shown highlighted in orange—no props, no clutter, just pure fruit perfection.
- Finally, click on the Insert button, highlighted in blue.
-
Images without Microsoft 365 or Copilot
What if you do not have a subscription version of PowerPoint? In that case, you may not have access to an extensive array of images. But there’s no reason you cannot use a picture from any other source. Just use your own image and insert the picture manually into PowerPoint.
- Once you click to insert that crisp apple image, bam!—it lands smack dab on your slide, fresh from PowerPoint’s photo orchard, as shown in Figure 4, below.
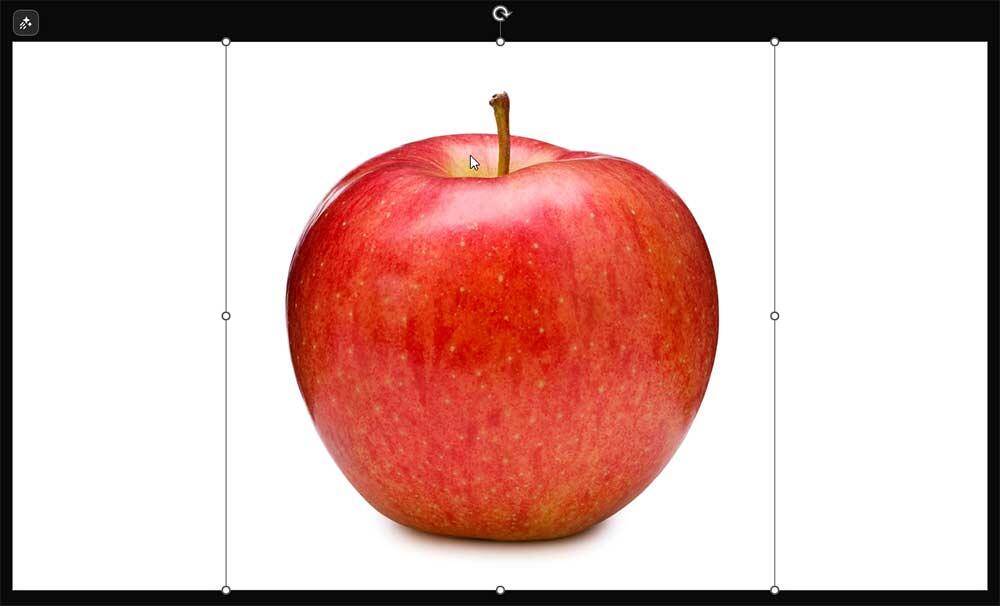
Figure 4: Apple image placed on the slide- Ready to get a little artsy with your apple? Let’s turn that juicy centerpiece into a bite-sized visual stunt double—with some acrobatics thrown in for good measure!
- Here’s your fruity flip guide:
- Resize the original apple to roughly one-tenth of its original size, as shown in Figure 5, below. Think of it like turning a full-sized red delicious into a mini snack-size version—small but still sweet!

Figure 5: A smaller apple- Hit Ctrl + D if you are using Windows, or ⌘ + D if you are on a Mac, to duplicate your downsized apple, as shown in Figure 6, below. It’s like making a twin with a single keystroke.
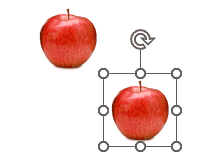
Figure 6: Duplicated apple- With the duplicated apple selected, go to the Picture Format tab (or the Shape Format tab, depending on what PowerPoint decides to call it today) of the Ribbon.
- Choose Rotate | Flip Vertical, as shown highlighted in red within Figure 7, below. This action flips your apple like it’s doing a handstand—bottom goes up, top goes down, as shown highlighted in blue within Figure 7.
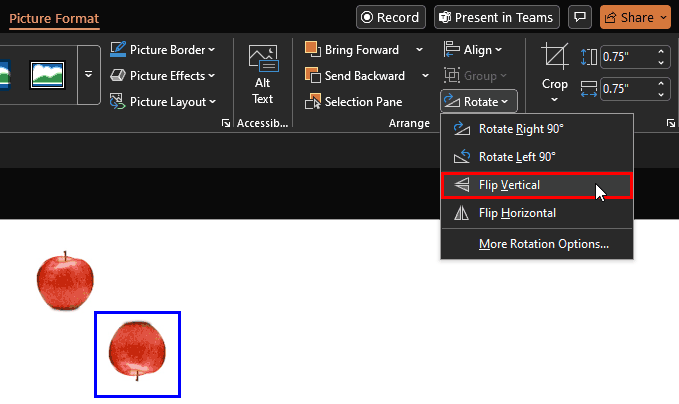
Figure 7: Flip Vertical
- Now, it’s time to line up your fruity duo like pros on a photoshoot runway—top apple, bottom apple, both standing tall with perfect posture.
- Here’s your sweet-n-simple centering method:
- Place the original apple at the top center of your slide. You don’t have to be absolutely accurate. Just ensure that you place it as high as you want.
- Similarly, drag and drop the flipped duplicate apple at the bottom center. Again, you don’t have to be accurate. Just ensure that the apple is close to the base of the slide, to achieve a balance with its twin apple on the top, as shown in Figure 8, below. Do note that PowerPoint’s Smart Guides will help you, as can be seen in Figure 8.
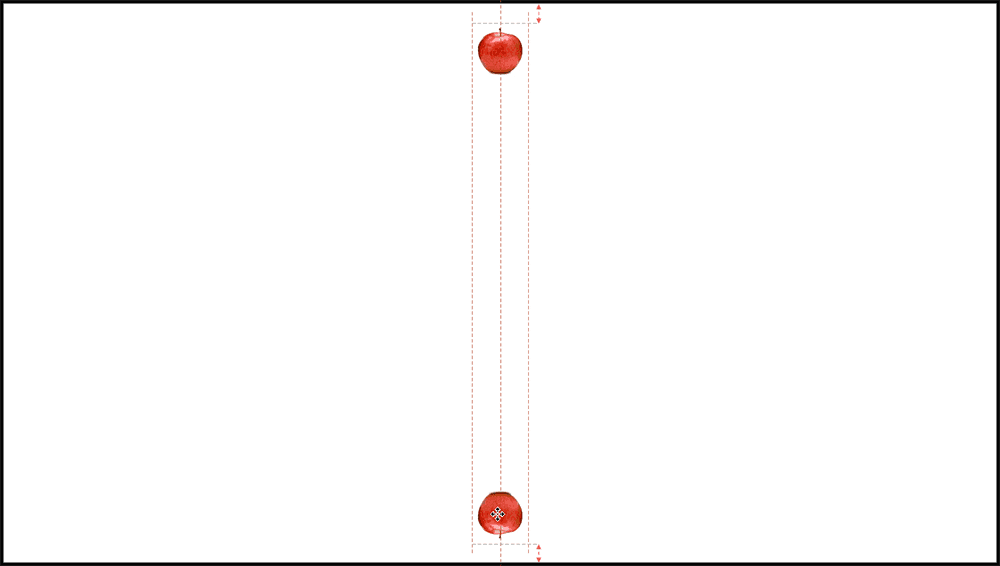
Figure 8: Twin apples at opposite ends- Select both apples—just drag a marquee box around them or use Ctrl + click for a manual shape handshake.
- Go to the Picture Format tab (or the Shape Format tab, if PowerPoint’s in a mood). Choose Align | Align Center, as shown in Figure 9, below.
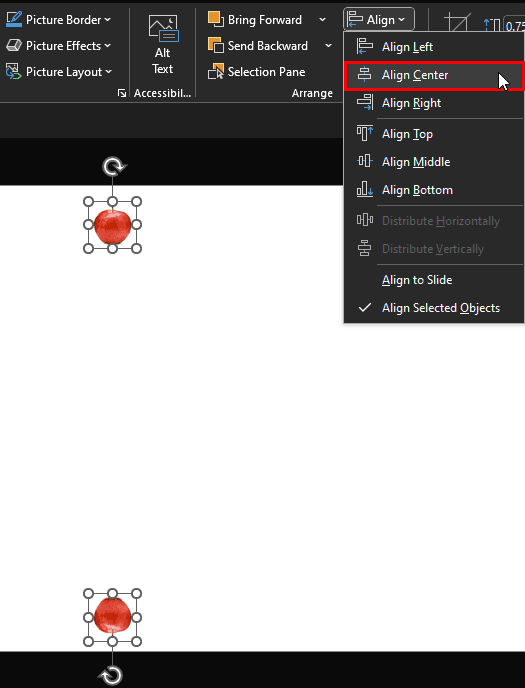
Figure 9: Align center with both apples selected
-
Fun Fact: Aligning Objects
Both apples line up along PowerPoint’s invisible vertical runway—like dance partners practicing the perfect lift. Did you know that the Align Center feature secretly uses math to calculate object midpoints. It’s like having a geometry tutor hidden inside your mouse click.
- So now your slide’s looking pretty tasty—with a crisp apple up top and its upside-down twin at the bottom, as shown in Figure 9, above. It’s time to lock in that look by grouping the pair together!
- Here’s how to serve them up as one tidy bundle:
- Make sure both apples are still selected—if they’re not, wrangle them up again with Ctrl + click or a marquee drag box. It’s like pairing socks before tossing them in the drawer—keeps things coordinated and easy to manage.
- Go to the Picture Format tab (or the Shape Format tab, depending on the version—PowerPoint likes keeping us guessing).
- Click Group | Group or press Ctrl + G, if you are using Windows, or ⌘ + Option + G, if you are on a Mac. Doing so groups both apples as one object. Boom! Your apples are now packed into one neat container—like sealing them inside the same lunchbox. You can see the resultant group in Figure 10, below.
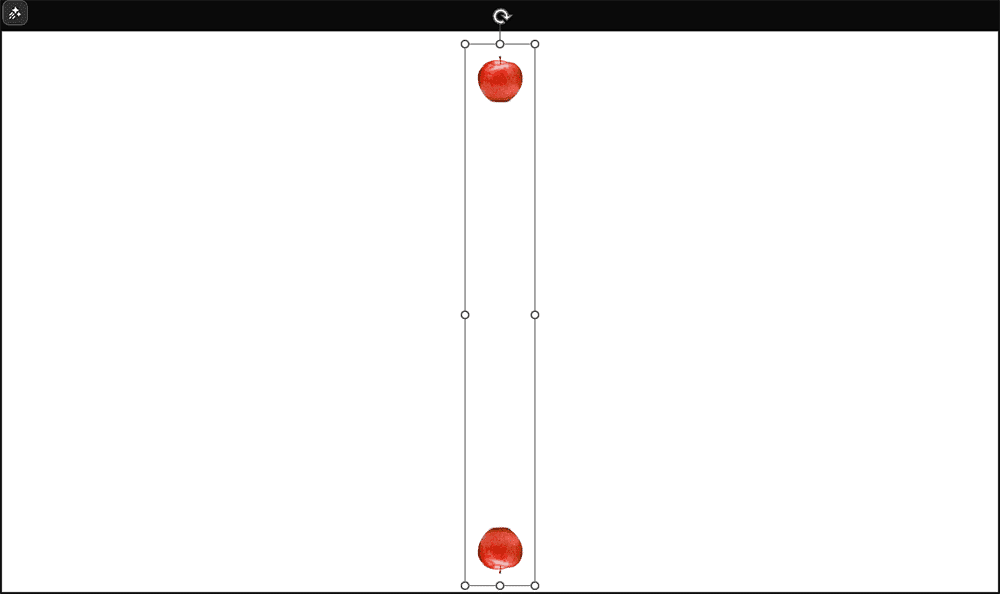
Figure 10: Grouped apples
-
Fun Fact: Grouping
Grouping is beloved by designers across apps because it keeps compositions intact. In PowerPoint, it’s especially handy for animations, resizing, and cloning complex layouts with one click. You can also use it to duplicate objects spaced apart, as we will do in this tutorial.
- You've got your perfectly paired apple group ready to shine—now let’s duplicate it like you're building a five-piece fruit orchestra. PowerPoint makes cloning this duo a breeze.
- Here’s how to grow your apple crowd:
- Make sure the apple group is selected—they’re your template team!
- Hit Ctrl + D four times if you are using Windows, or ⌘ + D if you are on a Mac. Each time you press the keyboard shortcut, you are photocopying your fruit buddies—instant clones, no bruising involved.
- By the end, you’ll have five identical apple groups, all standing by for alignment, animation, or fruit-themed choreography, as shown in Figure 11, below.
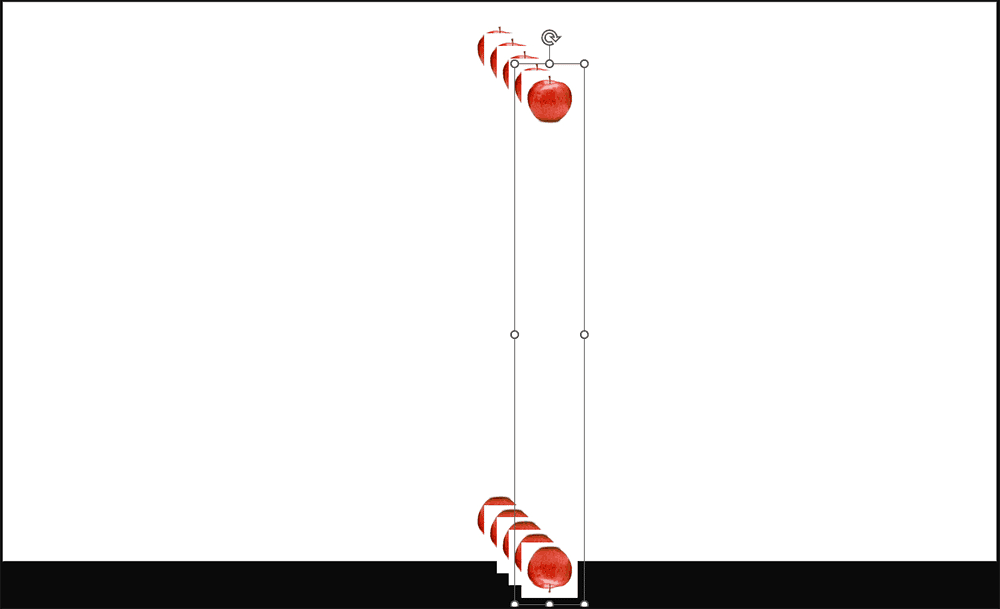
Figure 11: Duplicated apple groups- You've got five fruit-filled duos hanging out on your slide, and now it’s time to put them in perfect formation—like organizing lunchboxes in a neat little stack.
- Here’s your quick ‘n easy line-dancing guide:
- Hit Ctrl + A, if you are using Windows, or ⌘ + A, if you are on a Mac to select all your apple groups.
- Open the Picture Format tab (or the Shape Format tab, depending on what PowerPoint’s feeling like today).
- Click Align to open the magical Align gallery.
- Choose Align Left, then Align Top, as shown highlighted in red within Figure 12, below. Think of it as cornering your apple army into the top-left of your slide—like organizing fruit stickers in the neatest grid possible.
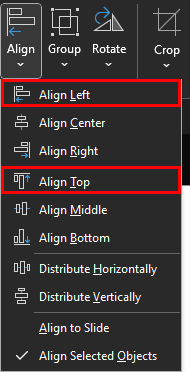
Figure 12: Align left and top
- So, you just aligned all your apple groups, and—wait a minute—you only see two apples, as you can see in Figure 13, below! It’s not a fruit mystery, we promise. They’re all still there... just perfectly stacked like pancakes in disguise.
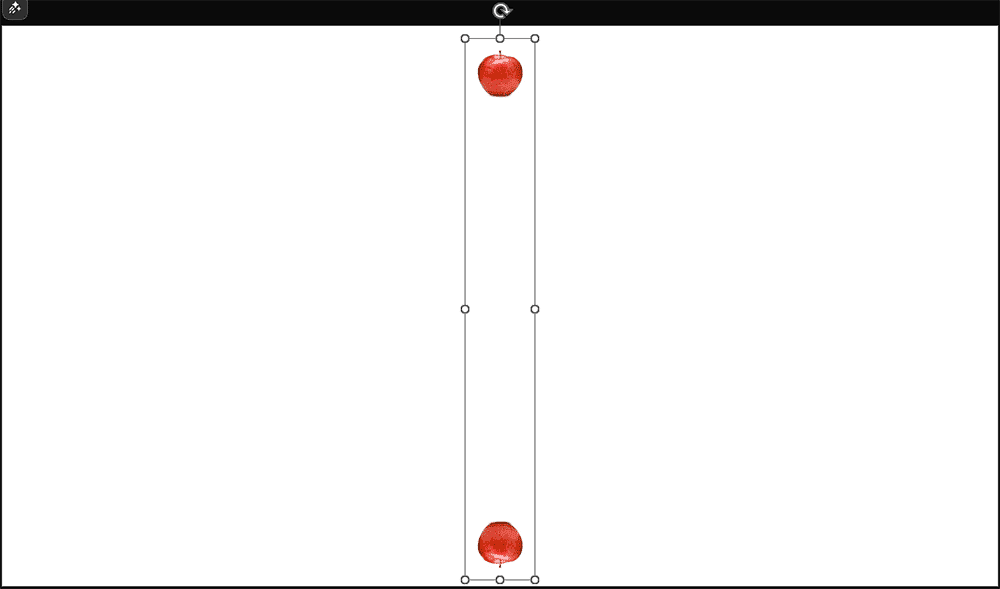
Figure 13: Where did the other apples go- Here’s what’s going on:
- When you use Align Left and Align Top, all the apples got tucked into the same exact spot.
- No need to panic—none of the apples are missing, they’re just layered on top of each other like a stack of playing cards.
- PowerPoint layers objects in order of creation—so the last shape you duplicated is the one showing on top. Kind of like the last pancake on the griddle is the one you eat first.
- Ever wish you could see everything happening behind the scenes of your PowerPoint slide—like checking which actors are hiding in the wings or which props are cluttering the stage? That’s what the Selection task pane does. It’s your all-access pass to managing slide objects like a boss.
- Here’s how to get there (no secret handshake required):
- Head over to the Home tab of the Ribbon.
- Click the Select button, highlighted in red within Figure 14, below (it’s hiding in plain sight near the Editing group).
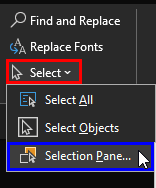
Figure 14: Bring up the Selection pane- Then choose Selection Pane, shown highlighted in blue within Figure 14, above.
- You can also use the Alt + F10 keyboard shortcut to show or hide the Selection task pane.
- When you summon the Selection task pane, shown in Figure 15, below, it’s like opening PowerPoint’s very own shape command center. This handy box pops up and shows you every object on your slide—even the sneaky ones hiding beneath others.
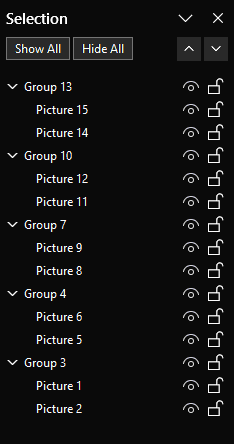
Figure 15: Selection task pane- The pane can either be docked to the side—like pinning a whiteboard to your workspace—or set loose as a floating window that you can drag anywhere, kind of like a sticky note on wheels.
- Now that your fruity performers are all lined up, it’s time to start tweaking them—one at a time. Think of your apple groups like a pyramid of cheerleaders: the one on the bottom holds everyone up, so don’t mess with that foundation!
- Here’s your step-by-step:
- Start from the bottom up. Don’t touch the bottommost apple group—it’s your anchor holding the whole orchard together.
- Select the apple group directly above that bottom one. Using the Selection Pane? That’s your backstage pass. Picking the second-from-bottom group will highlight it on the slide like a spotlight on the second acrobat in the routine.
- Head to the Picture Format tab (or Shape Format, depending on whether PowerPoint’s feeling artsy or geometric today).
- In the Size group—located all the way on the right—click the tiny square arrow in the corner, highlighted in red within Figure 16, below. That’s the dialog launcher, your secret door to deeper settings. It’s kind of like pushing the tiny button on a vending machine that opens a whole new snack drawer!
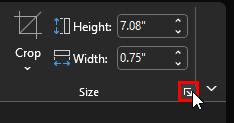
Figure 16: Click the Size dialog launcher
- Doing so will bring up the Format task pane. Do note that you now have two task panes open: Selection and Format. They will occupy the same area on the right side, and will be tabbed, as can be seen highlighted in red within Figure 17, below.
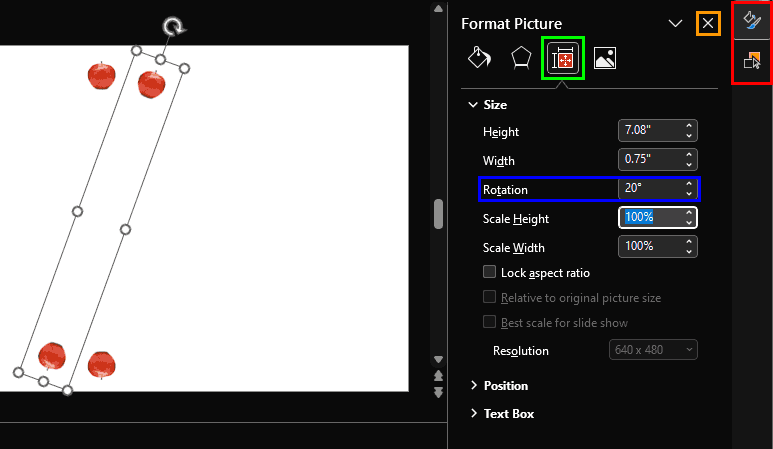
Figure 17: Rotate your apple groups- You're officially entering the fruity rotation zone—time to give your apple a stylish 20° twist while keeping your creative control room open and ready for more action!
- Here’s your snack-sized how-to:
- In the Format tab, click on the Size tab, highlighted in green within Figure 17, above.
- Type 20 into the Rotation box, highlighted in blue within Figure 17. This move gives your apple group a subtle lean, like tilting a painting slightly for dramatic flair, as can be seen in Figure 17.
- Don’t click the Close button on the Format task pane, highlighted in orange within Figure 17. That's like slamming the toolbox shut while you're still assembling your apple sculpture.
- You’ve already given one apple a stylish spin—now it’s time to keep the fruity momentum going! We’re building a spiral staircase of apples, each one turning a little more than the last. Think of it like choreographing a synchronized fruit ballet.
- Here’s your step-by-step swirl strategy:
- Select the third-last apple group from the bottom of the stack within the Selection pane.
- In the Format task pane, type 40° into the Rotation box. That’s a deeper twist than the previous 20° rotation—like your apple’s doing a dramatic head turn on stage.
- Keep going up the stack, selecting each apple group one by one. Add 20 degrees more each time:
- Next apple: 60°
- Topmost apple: 80°
- It’s like stacking playing cards with a slight fan—each one rotated just enough to create a dazzling spiral. By the end, your apples will form a beautiful spiral pattern, just like the one shown in Figure 18, below. It’s part geometry, part art, and all PowerPoint magic.
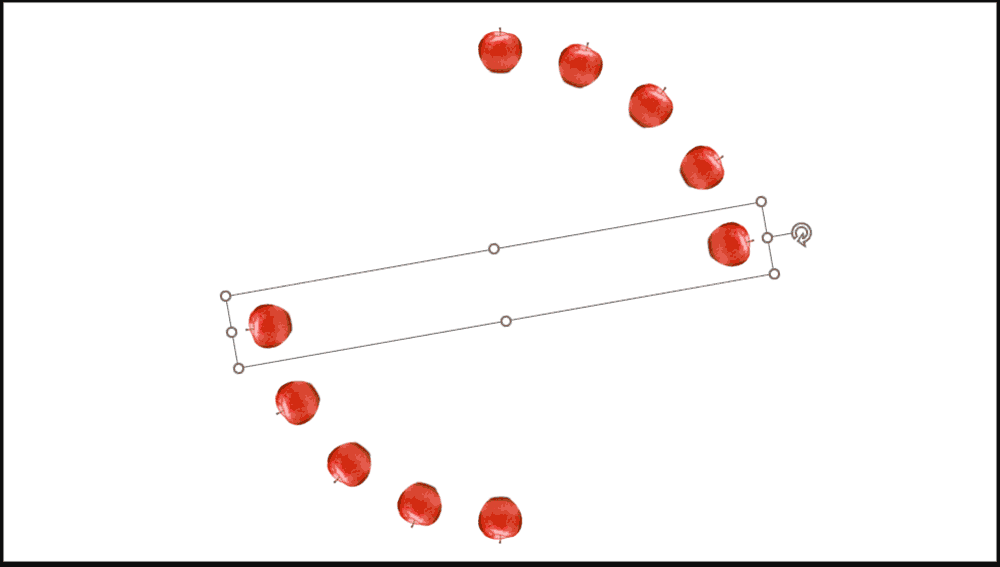
Figure 18: Rotated apple groups- You’ve rotated, stacked, and styled your apples like a fruit-themed origami artist. Now it’s time to wrap up the whole spiral into one neat package—so it behaves like a single superstar on your slide.
- Here’s how to group your fruity creation:
- Press Ctrl + A (Windows) or ⌘ + A (Mac) to select all the apple groups—rounding up your fruit squad like a harvest parade. It’s like using a giant fruit net—every apple gets scooped up in one go!
- Right-click carefully (or Ctrl + click on a Mac)—no sudden moves! You don’t want to nudge your spiral out of alignment. Think of it like placing a cherry on top of a cake—precision matters.
- In the menu that pops up, choose Group | Group, as shown highlighted in red within Figure 19, below. Boom! Your apples are now fused into one glorious fruit wheel—easy to move, resize, or animate as a single unit.
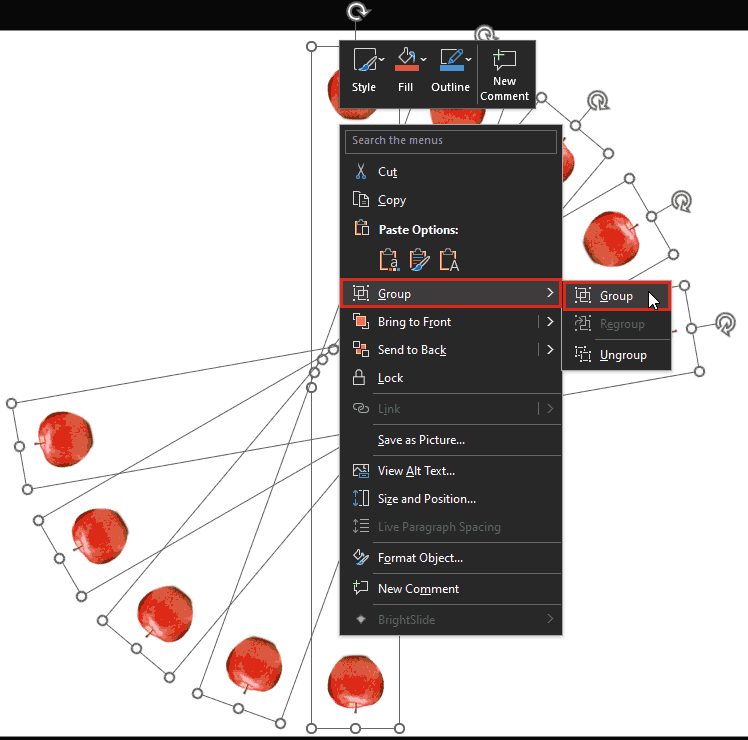
Figure 19: Apple pairs are grouped- You can also use the Ctrl + G keyboard shortcut if you are using Windows, or ⌘ + Option + G if you are on a Mac to group all apple pairs as one object.
- Design analogy: Grouping is like shrink-wrapping your design. Everything stays in place, and you can carry it around without dropping a single apple.
- Your apple spiral is looking fabulous, as shown in Figure 20, below—but it’s not a full circle yet.
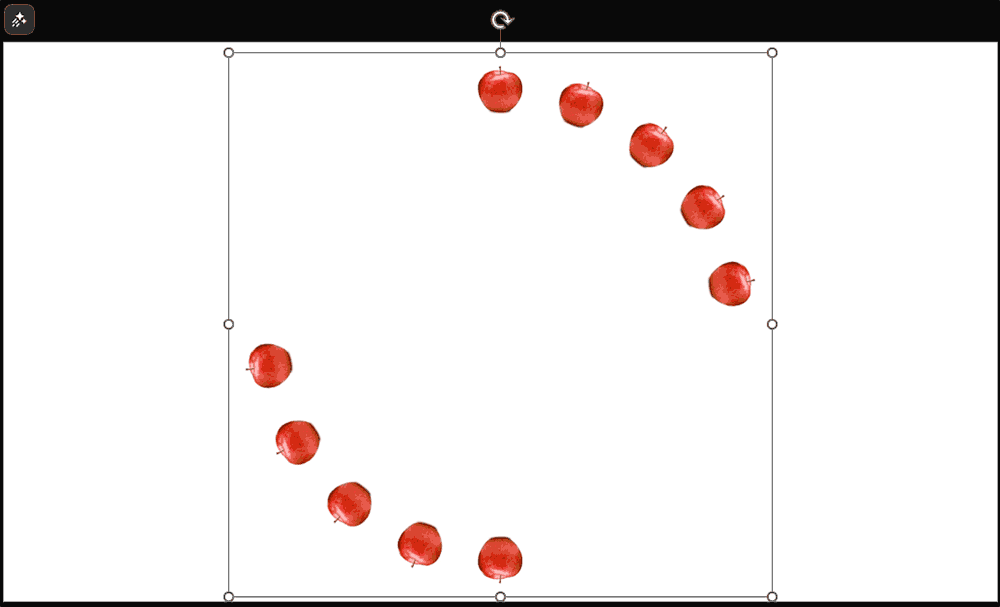
Figure 20: Apple spiral- It’s time to clone your fruity masterpiece. Here’s your duplication process:
- With your group still selected, press Ctrl + D if you are using Windows, or ⌘ + D if you are on a Mac, to duplicate the entire set of apples. It’s like photocopying your fruit art—same twist, same flair, zero effort.
- Press Ctrl + A if you are using Windows, or ⌘ + A if you are on a Mac to select both groups—your original and its shiny new twin, as shown in Figure 21, below. Think of it like grabbing both ends of a fruit garland—you’re about to hang it up perfectly.
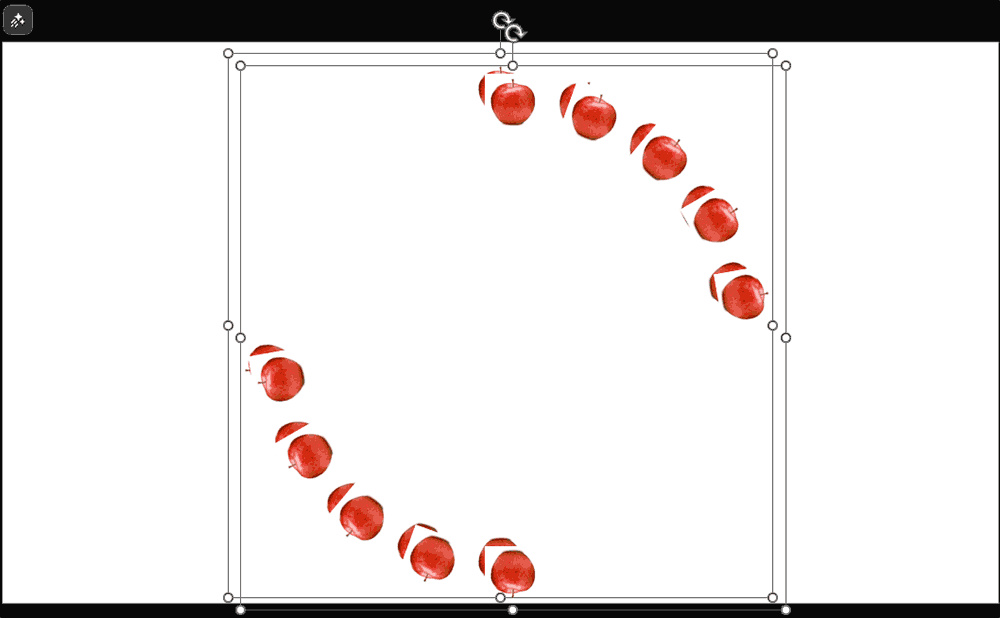
Figure 21: Select both apple groups- Head to the Picture Format tab (or Shape Format, depending on what PowerPoint’s calling it today), and click Align to open the Align gallery. Then, choose both Align Left and Align Top, as shown previously on this page in Step 10d, as shown in Figure 12, previously on this page.
- Both spirals snap into the top-left corner of your slide, as shown in Figure 22, below.
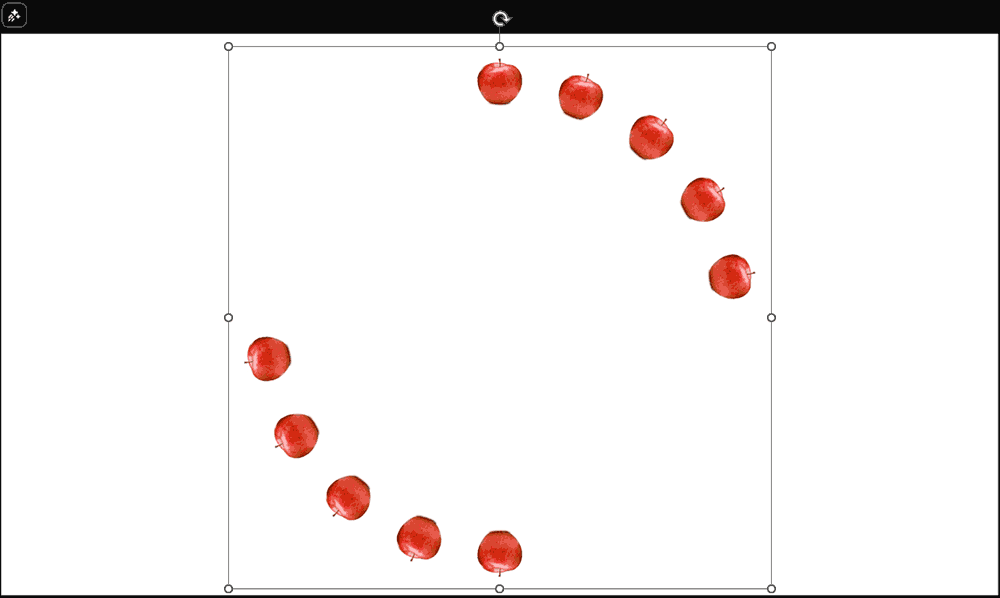
Figure 22: Apple groups aligned- You’re almost at the finish line of your fruity masterpiece! Just one more spin and your apple spiral will transform into a full-blown apple spirograph—the kind of design that makes people say, “Wait… you did that in PowerPoint?!”
- Here’s your final flourish:
- Click on an empty area of the slide to deselect everything—like stepping back from a puzzle so you don’t accidentally nudge a piece.
- Open the Selection task pane and select the top apple group—your soon-to-be showstopper.
- Head back to the Format task pane, as explained in Step 14d (see Figure 16, shown previously on this page).
- Now, in the Format task pane, click on the Size tab, as shown in Figure 17, previously on this page.
- In the Rotation box, type 100, as shown highlighted in red within Figure 23, below.
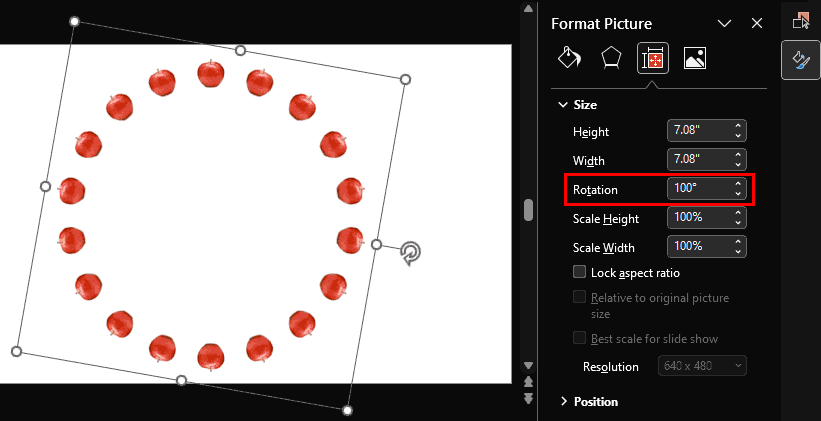
Figure 23: Completed apple spirograph- So, your apple spirograph is now a full circle, and looking fabulous. However, you may want to animate each apple individually, or swap them out for bananas, oranges, or even dancing pineapples. To do so, you’ll need to ungroup your masterpiece and set those apples free!
- Here’s your fruity ungrouping guide:
- Press Ctrl + A if you are using Windows, or ⌘ + A if you are on a Mac to select all shapes—round up the entire apple parade. It’s like grabbing every apple in the orchard with one magical magnet.
- Right-click (or Ctrl + click if you are on a Mac) carefully—no sudden mouse moves! You don’t want to send your apples flying off the spiral. Think of it like gently peeling a sticker—you want precision, not chaos.
- In the resultant menu, choose Group | Ungroup or press the Ctrl + Shift + G, if you are using Windows, or ⌘ + Shift + Option + G, if you are on a Mac to ungroup your apple spirals. Doing so cracks open the first layer—like unzipping a fruit basket.
- Now, without changing the selection, ungroup two more times, so that you end up with the individual apples, as shown in Figure 24, below. By the third ungroup, you’ll have all your apples as individual, editable shapes.
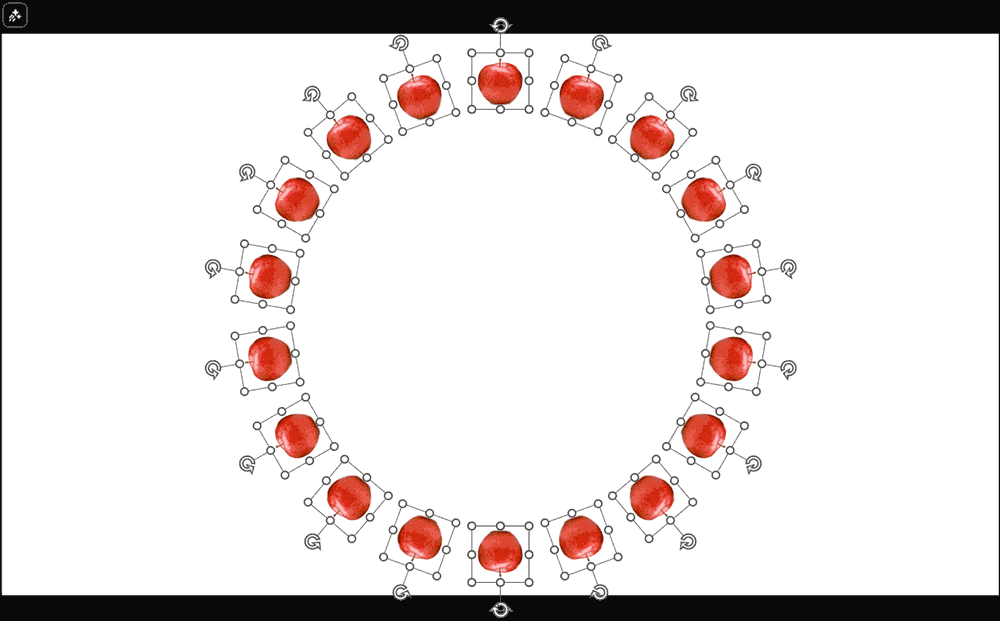
Figure 24: Ungrouped apple spirograph-
Replace Apples with Something Else
You can replace the apples in the spirograph with other pictures! To do so, make sure you ungrouped the shapes as explained in step 21. Then press Ctrl + A if you are using Windows, or ⌘ + A if you are on a Mac to select all shapes, select the Picture Tools Format tab on the Ribbon, and click Change Picture to bring up the Insert Picture dialog box. Choose any suitable picture – experiment and you'll achieve picture spirographs so amazing that people will have a difficult time believing this was created within PowerPoint!
- Yes, we created the spirograph with apples. But you can use almost any picture, as long as it contains an isolated, simpler object. Figures 25 and 26, below, show you some of these spirogrpahs.

Figure 25: Spirograph with baby pictures
Figure 26: Spirograph with clip art


