This tutorial shows you how you can create a simple cutout in Adobe Photoshop, and then save it as a transparency-equipped PNG. This tutorial uses Photoshop CS3, but the technique works in the same way in earlier versions of Photoshop.
Follow the steps to create a cutout in Adobe Photoshop:
- In Photoshop, open the picture from which you want to create a cutout, as shown in Figure 1, below.
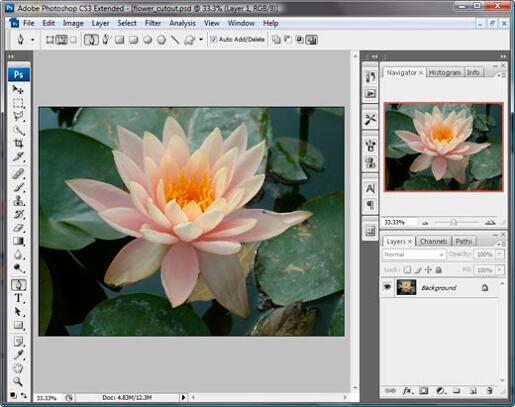
Figure 1: Picture opened in Photoshop - Select the Pen tool from the Tools palette, as shown in Figure
2, below.
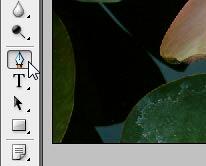
Figure 2: Pen tool - Now within the Options palette, click the Paths icon, as shown in Figure 3, below, so that you can make a selection with a path.

Figure 3: Pen tool No Options Palette?
If your Photoshop interface doesn't have an Options palette at the top, choose Windows | Options to activate the Options palette.
- Now, zoom on part of the picture, and start making the selection minutely, as shown in Figure 4, below. Continue making the selection until you get back to the point you started from. Click on the starting point to create a closed selection path.
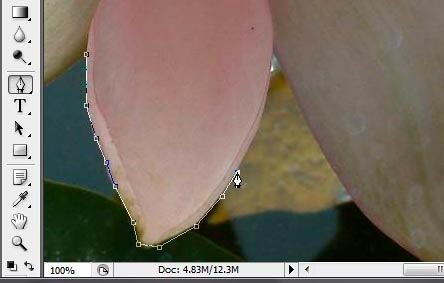
Figure 4: Making a selection using the Pen tool
Note: Make sure you close the path to get a proper selection.
- Figure 5, below, shows the path selection created. As you can see, the water lily has been isolated from the rest of the picture.

Figure 5: Path selection - Now, press Ctrl+Enter to create a selection from the path, as shown in Figure 6, below. You'll know that this is a selection when the water lily (or anything else in your picture) has a path of marching ants around it.

Figure 6: Selection - Press Ctrl+J to copy the selection to a new layer. Figure 7, below, shows a new layer created in the Layers palette.
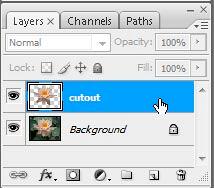
Figure 7: New layer - Figure 8, below, shows you the cutout after we hid the background layer.

Figure 8: Cutout - Now choose the File | Save for Web & Devices option, as shown in Figure 9, below. Users of previous Photoshop versions will choose the File | Save for Web option.
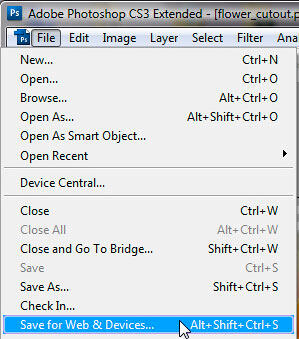
Figure 9: Save for Web - Doing so opens the Save for Web & Devices dialog box, as shown in Figure 10, below. On the right side of the dialog box, choose PNG-24 from the preset dropdown menu and check the Transparency option.
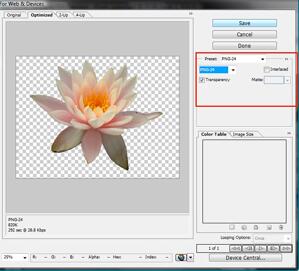
Figure 10: Save for Web & Devices dialog box - Click the Save button to export the cutout to a PNG file.
Using PNGs in PowerPoint
Any cutouts that you export as PNGs can be inserted within PowerPoint slides, and PowerPoint will show all areas that are not part of the cutout as transparent.
Back


