Introduction
GeniuX®Photo EFX is an Adobe Photoshop-compatible plug-in and also a standalone program that lets you perform photo editing and digital painting tasks. You can load photos from your digital camera (including RAW data). Then you can modify your photos with enhancement tools and special effects. There are almost 80 filters with more than 300 settings and over 30 papers effects. You can use different effects on the same photo, play around and combine effects. Finally you can share your output via email, or print a poster.
GeniuX Photo EFX is from XPro Software, a company based in Italy, you learn more about their products and download a trial version of GeniuX Photo EFX from the XPro Software site.
Back
How To Use
Follow these steps to use GeniuX Photo EFX:
- Open an image you want to use inside Adobe Photoshop or a similar program.
- Choose the Filter | XPro Software | GeniuX Photo EFX 2 option, as shown in Figure 1, below.

Figure 1: GeniuX Photo EFX 2 - Doing so opens the selected image within GeniuX Photo EFX 2 interface, as you can see in Figure 2, below.
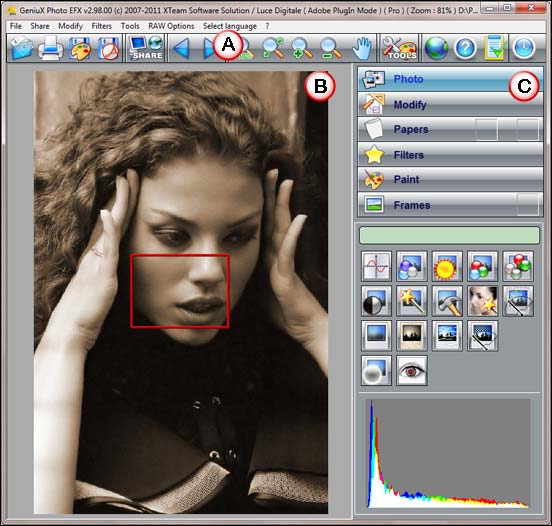
Figure 2: GeniuX Photo EFX 2 interface - The interface is explained below. Each area corresponds to an area marked in Figure 2:
A. Main Toolbar
- The upper part of interface provides buttons for options such as Undo/Redo, Zoom, Save, Print, Help, etc.
B. Preview
- This area displays the changes that occur on your active image, as you select and fine-tune the effects.
C. Panels
- Here you get six panels to modify your photos and apply special effects. When a panel is selected you'll get to see the related tools/parameters in the bottom section of the interface. All the six panels and their tools/parameters are explained below:
Photo
- Provides tools such as gamma correction, auto contrast, brightness/contrast, adjust RGB, red eye removal, photo repair, clean-up, glow, etc., as shown in Figure 2, above.
Modify
- Resize, flip, mirror, rotate, crop, etc., as shown in Figure 3, below.
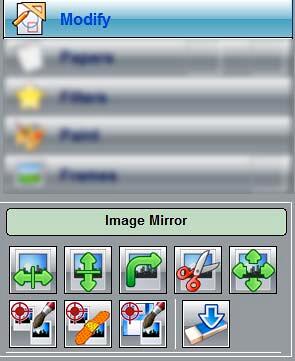
Figure 3: Modify panel tools Papers
- 30 Paper effects in total provide effects such as plaster, floor tile, wall tile, wallpaper, fabric, canvas, wood, etc. You can further control the transparency and size of the paper, as shown in Figure 4, below.
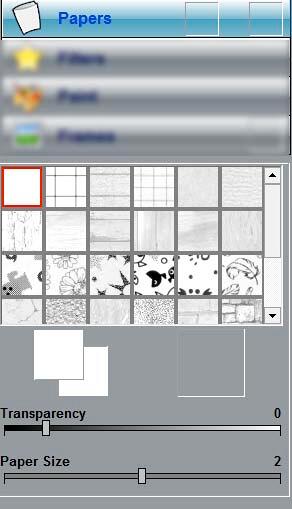
Figure 4: Papers panel parameters Filters
- Around 80 filters are there in this panel, as shown in Figure 5, below.
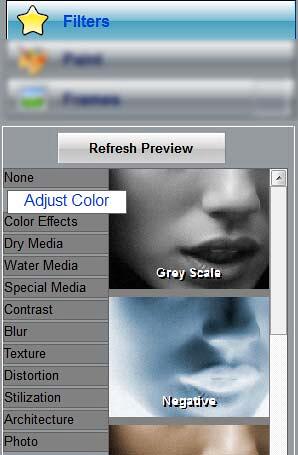
Figure 5: Filters panel parameters Paint
- Provides tools to paint, you can control the selected tools' parameters, as shown in Figure 6, below.
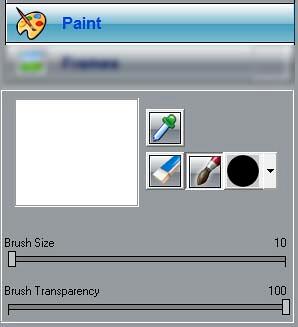
Figure 6: Paint panel tools and parameters Frames
- Select and apply a frame, as shown Figure 7, below.
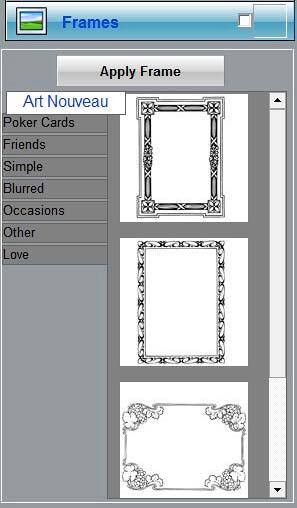
Figure 7: Choose frames from the Frames panel - Choose any filter of your choice. Doing so opens the Filter Options dialog box, as shown in Figure 8. Within this dialog box, you'll find options to make further tweaks in the filter you have selected. You can apply all these filters in two ways:
Flood Fill
- This applies the filter to the entire photo.
Drawing filter with Brush
- This option let's you apply the filter manually on the photo. Just select the brush style/size and apply the effect on the areas of your choice.
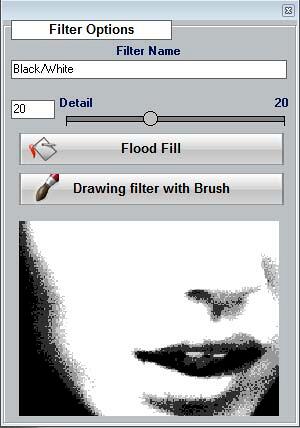
Figure 8: Filter Options dialog box - Apply any filter or enhance your photo. Once you are happy with the outcome, choose any of these two options from the Main Toolbar:
- Save Image (highlighted in blue within Figure 9): This option will save the changed photo as a .jpeg file.
- Share with Photoshop (highlighted in red in Figure 9): This option will open the changed photo within Photoshop (launches as a new document in Photoshop).
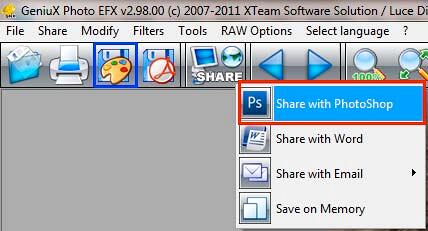
Figure 9: Save and Share options on the Main Toolbar
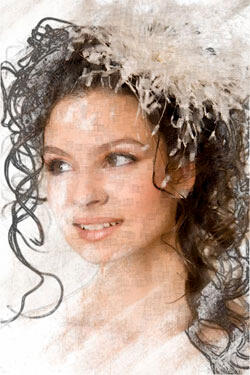
Here are some Before and After samples:





Back
Specifications
| Photoshop Versions: |
Photoshop 6 and higher |
| Platforms: |
Windows |
| Site: |
XPro Software site |
| Price: |
41.00 € |
| Trial Version: |
Available |
Back


