This is the print version of this page. All content is copyright Indezine.com 2000-2026.
Learn how to convert a PowerPoint recording into a professional training video with Filmora 16
Author: Barrera Alcova
PowerPoint’s “Record” feature captures narration and slide timings in one session. An onboarding presentation can seem ready once the final slide ends. However, the 22-minute recording repeats cost codes, includes pauses between slides, and skips explanations of terms a live presenter would normally clarify.
New hires watching alone cannot ask questions, making clear explanations essential. To address these gaps, Filmora video editor supports exported PowerPoint recordings and fresh screen recordings. Filmora 16 also offers AI text-based editing to remove unnecessary sections and improve the video's flow. The goal is to create a training video that new hires can follow independently.
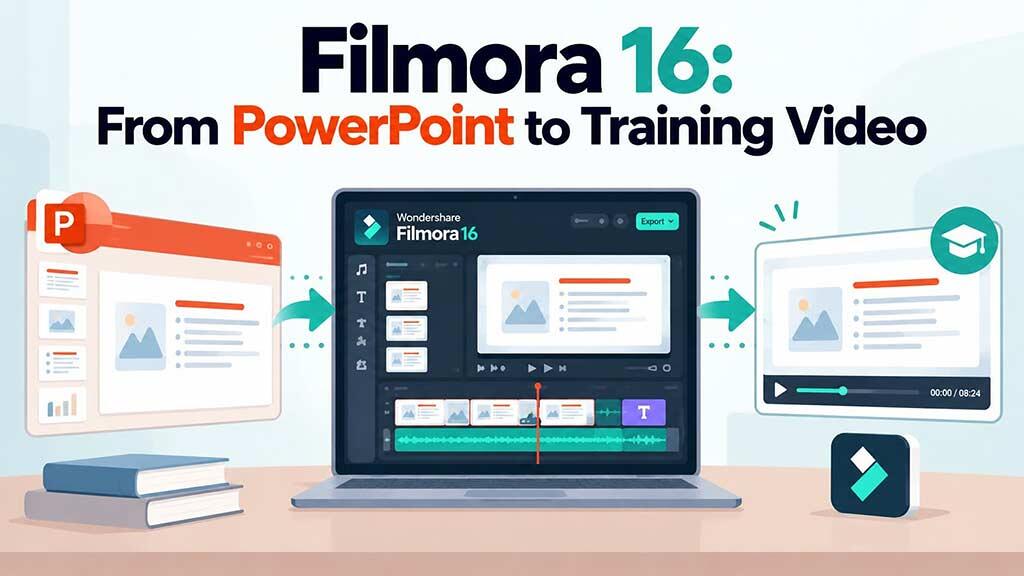
An effective training video focuses on one learning outcome that viewers can achieve afterward. Before editing, define that goal and review each slide for relevance. For example, a 14-slide onboarding presentation about expense claims aims to help new hires “Submit an expense claim with an itemized receipt and the right cost code.” The following table shows which slides to keep, simplify, or remove:
| Slide Group | Decision | Reason |
|---|---|---|
| Slides 1–2 (Welcome) | Cut | Replace the welcome slides with a brief title and learning objective. |
| Slides 3–5 (Policy History) | Simplify | Keep the spending limit and essential rules. Remove unnecessary policy history. |
| Slides 6–10 (Portal Demo) | Keep in full | Each step demonstrates how to complete and submit an expense claim. |
| Slide 11 (Cost Code Chart) | Keep and extend | Give learners enough time to identify and read the correct cost code. |
| Slides 12–14 (Live Questions) | Cut or simplify | Remove audience-specific questions, but retain essential answers and relevant links on the course page. |
The planned cuts reduce the 22-minute recording to approximately 9 minutes, focusing on the portal demonstration and cost code chart.
The 9-minute training video can be created from the original 22-minute recording or a fresh take. Your choice depends on the recording’s quality and whether the slides need updating. The following two options explain when to use each approach:
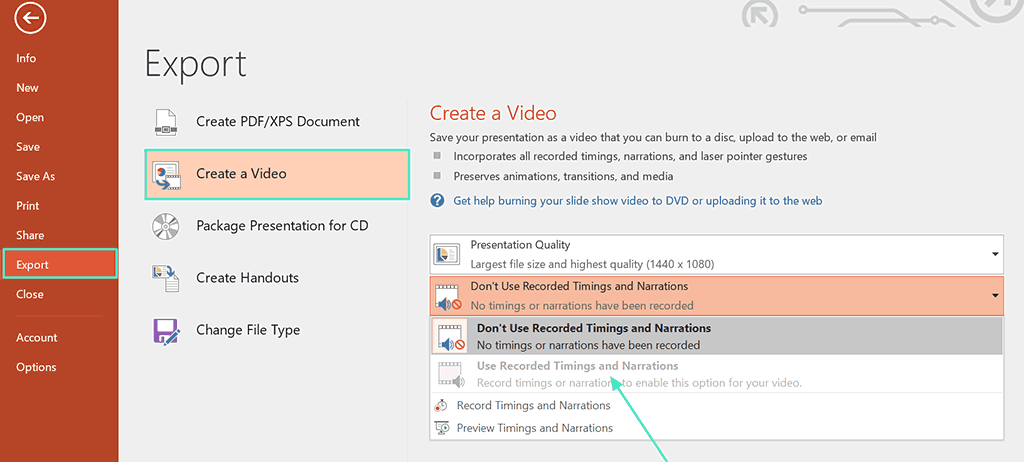
For a fresh recording, open Filmora’s screen recorder with webcam and audio. Select Full to capture the entire display showing your slides and portal. Enable Microphone to record narration and Camera if the presenter needs to appear. Position the webcam overlay in an empty corner to avoid covering important charts or form fields.
Filmora 16 also offers improved Screen Annotation tools for drawing, adding arrows, and highlighting content during recording. Use these tools to emphasize important fields, such as the receipt upload section, without adding callouts later.
With the footage ready, arrange the clips in a logical sequence so learners can follow each step easily. Filmora’s presentation video maker offers various presentation templates, although a simple title style works well for this training video. Follow these 5 steps to organize the recording:
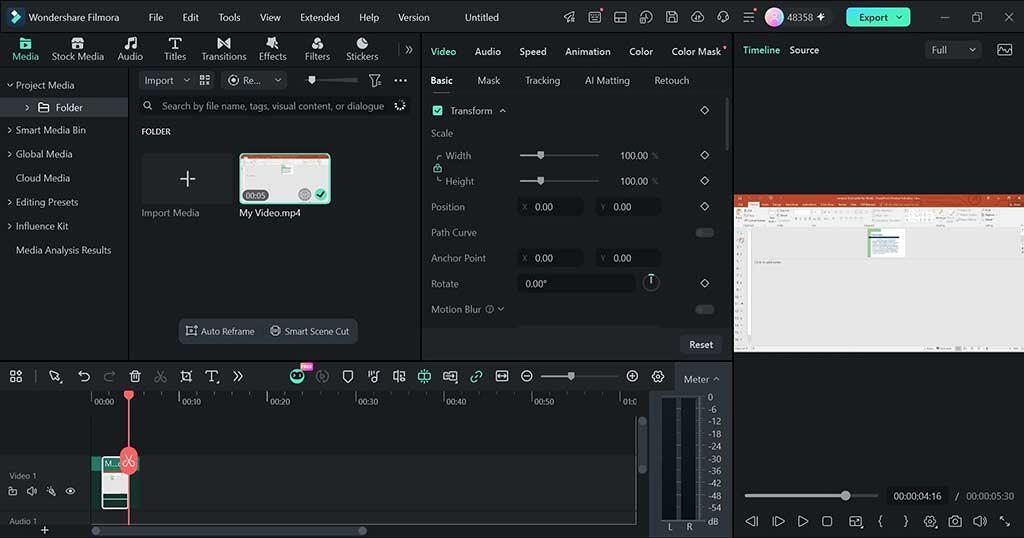
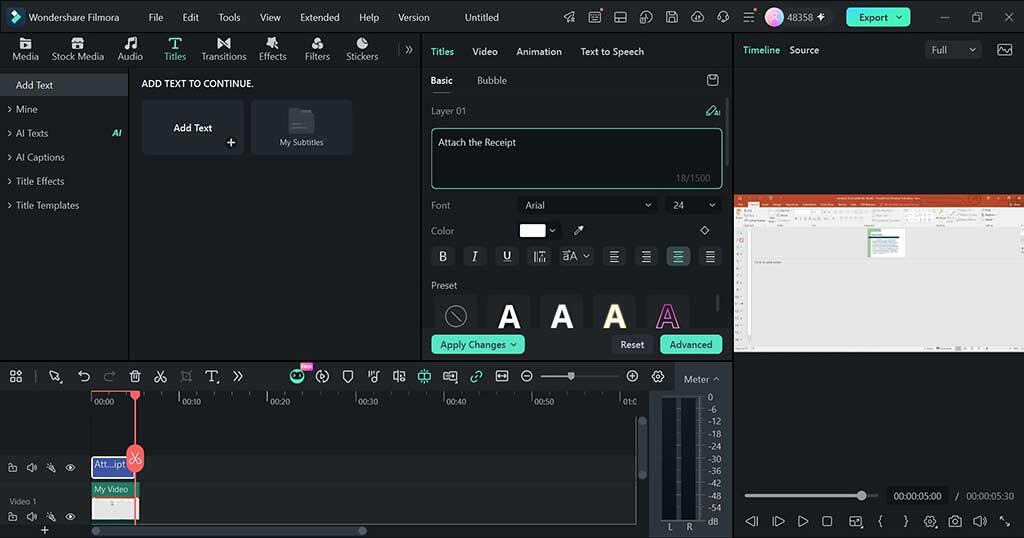
The trimmed recording still contains repeated explanations of cost codes. Filmora’s AI text-based editing converts narration into editable text, allowing you to identify and remove repeated sections without manually searching the timeline. Follow these 3 steps to transcribe the recording, remove unnecessary content, and review the edits:
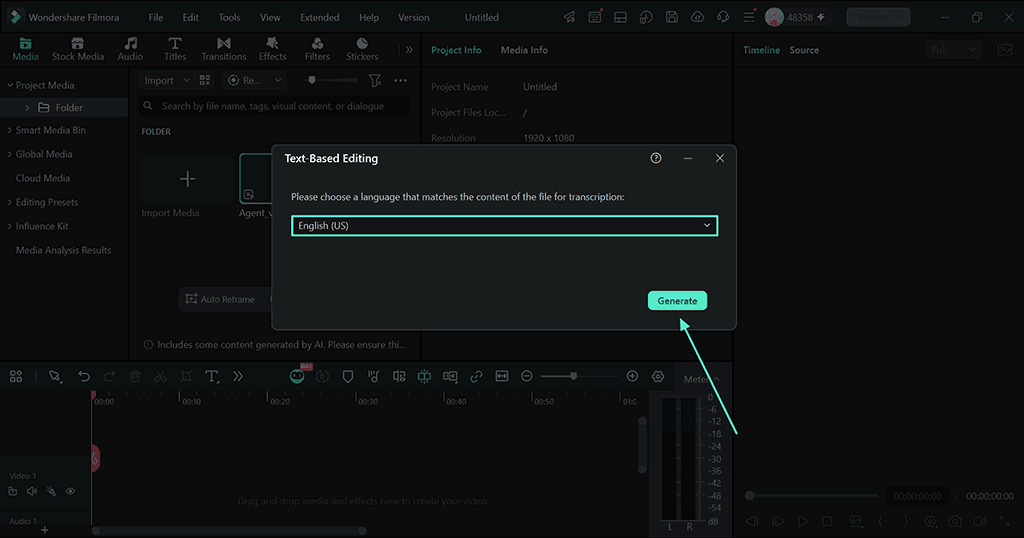
Select the recorded clip and open “Tools > Audio > AI Text Based Editing.” Choose “English” and generate the transcript. Review it for transcription errors, especially names and cost codes, before making edits. An accurate transcript makes repeated explanations easier to identify.
Search the transcript for “cost code” to locate both explanations on the chart slide. The second appears after a 30-second tangent. Select and delete the tangent and repeated explanation, removing approximately 70 seconds. Avoid automatic silence removal because the demonstration includes intentional pauses for reading charts and following on-screen actions.
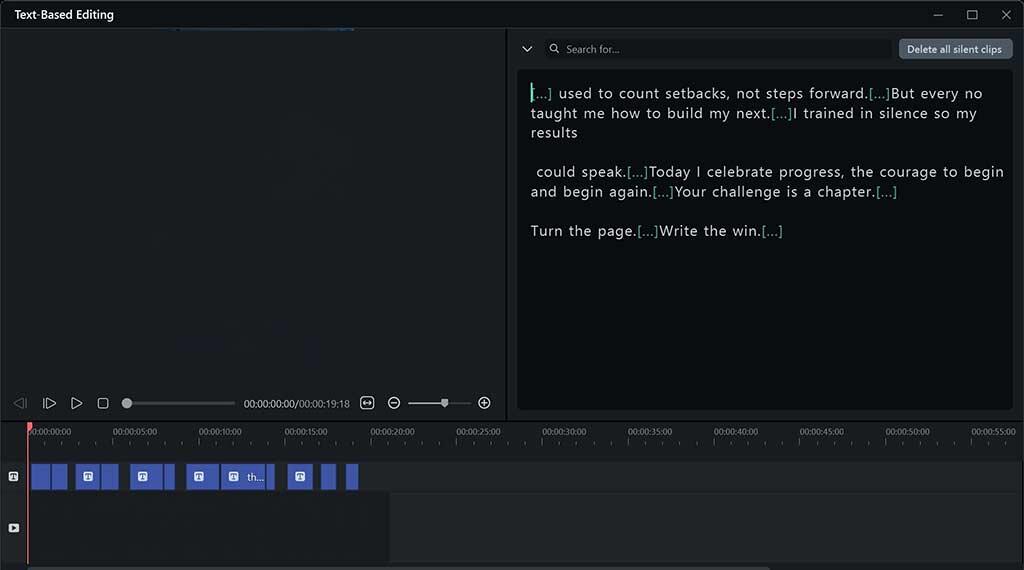
Play the recording around each cut before applying the changes to the timeline. Check for abrupt slide transitions or missing explanations. If a cut briefly reveals an unwanted slide, adjust the selection boundaries. Listen for phrases like “as I just showed” that refer to deleted content and remove or revise them.
A live presenter can highlight important details, explain figures, or pause on complex slides. In a recorded training video, clear visuals and captions must provide similar guidance. Before sharing the finished video, review the following 5 elements to ensure new hires can understand each step independently:
| Check | What to Confirm |
|---|---|
| Slide Text | Body text follows Microsoft's recommendation of at least 18 pt, with smaller text corrected in the original PowerPoint deck. |
| Charts and Diagrams | The cost code chart remains visible long enough to read. Use “Add Freeze Frame” (Alt + F) to extend its display time. |
| Captions | Filmora 16 lets you edit subtitles on the timeline. Use “Apply to All” to maintain consistent font size and styling across captions. |
| Audio Levels | Audio peaks on the left and right meters remain below the maximum level, including during any re-recorded narration. |
| Callouts | Position arrows beside important chart labels without covering text, form fields, or the webcam overlay. |
Keep the original .pptx file with your Filmora project to simplify slide corrections. To fix a typo, update the slide in PowerPoint and export it as a PNG using “File > Save As,” then select “Just This One.” Place the image on a track above the recording for that slide’s duration. If the replacement covers important webcam footage, consider re-recording that section.
After completing the edits, review the training video from a new hire’s perspective. Since the creator already knows the material, some unclear explanations or transitions can go unnoticed. A learner-focused review helps identify these gaps and confirm whether the edits improved clarity. The following table compares the original cost code explanation with the edited version:
| Original Passage | Edited Version |
|---|---|
| Cost codes are explained at 15:50 and repeated at 17:00 after an unnecessary tangent. | The explanation appears once at 07:35, with the cost code chart visible. |
| The presenter moves to the next slide just 2 seconds after finishing the explanation. | An 8-second freeze frame keeps the chart visible for additional reading time. |
| The presenter says “As you can see here” without clearly identifying the referenced cell. | An arrow and short caption highlight the relevant “Department Code” column. |
| The chart slide lasts approximately 2 minutes and 10 seconds. | The edited section lasts about 1 minute, followed by an 8-second hold, while preserving essential instructions. |
The edited passage is shorter without losing essential information. Confirm that the learning objective, spending limit, and all four demonstration steps remain intact. Before sharing, watch the exported video at its intended viewing size, such as a half-width window on a 13-inch laptop. Check that captions, chart labels, and callouts remain readable.
The expense claim video succeeds when a new hire can follow it independently and submit a correct claim on the first attempt. Removing 5 unnecessary slides and refining the narration helped achieve that goal. If you have a recorded PowerPoint presentation, try this Filmora 16 workflow before expanding it into a longer course or training series.


Microsoft and the Office logo are trademarks or registered trademarks of Microsoft Corporation in the United States and/or other countries.