Learn about Curved and Straight line segments within PowerPoint 2016 for Windows. These segments are the lines between points or vertexes.
Author: Geetesh Bajaj
Product/Version: PowerPoint 2016 for Windows
OS: Microsoft Windows 7 and higher
A line (outline) in PowerPoint contains both points and segments. It is easy to understand the relationship between points and segments using a connect-the-dots analogy. The points represent the dots whereas the segments represent the lines you draw between the dots. Among points and segments, we have already explored the types of points in PowerPoint 2016 for Windows. We now explore the two types of Segments in PowerPoint 2016 for Windows: Straight and Curved. Segments can be edited and you can also convert a straight segment to a curved segment and vice versa, as you will learn in this tutorial.
Let us show you how you can identify which type of segment you are starting with; it's easy to identify a segment type:


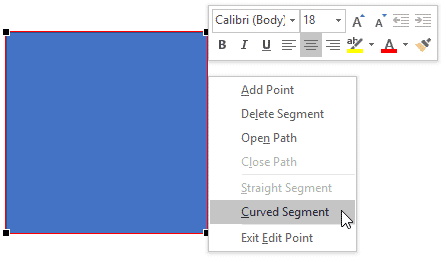
Now that you know how you can identify which Segment type you are starting with, let us explore how you can change one Segment type to another.
Follow these steps to change a Straight segment into a Curved one:

To change a Curved Segment to a Straight Segment, follow these steps:


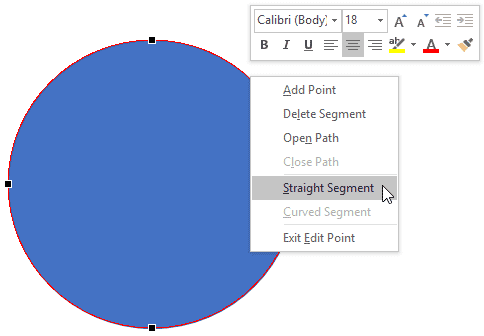

You can also click anywhere on a segment and drag it as required to change the structure of the shape. PowerPoint automatically adds a new point (vertex) at the point you dragged the segment, as shown in Figure 9 (compare to Figure 7).

Figure 9: New point is added on the segment
You can add and delete these points as required.
06 14 05 - Advanced Drawing Techniques: Edit Points: Curved and Straight Line Segments in PowerPoint (Glossary Page)
Edit Points: Curved and Straight Line Segments in PowerPoint 2013 for Windows
Edit Points: Curved and Straight Line Segments in PowerPoint 2011 for Mac
Edit Points: Curved and Straight Line Segments in PowerPoint 2010 for Windows
Edit Points: Curved and Straight Line Segments in PowerPoint 2007 for Windows
You May Also Like: Shining Online During Your Next Live Webinar | Ice Age PowerPoint Templates


Microsoft and the Office logo are trademarks or registered trademarks of Microsoft Corporation in the United States and/or other countries.