Once you insert an organization chart in PowerPoint 2011, you might find that the shapes available are not sufficient for your requirements, and you may want to add some more shapes to your org chart. The default org chart that PowerPoint places has very few shapes. Also you may need more hierarchy levels for the new shapes you will add. Fortunately, you can make these additions and edits with just a click or two.
Follow these steps to add more shapes and hierarchy levels to your org charts in PowerPoint 2011 for Mac:
- Select your existing org chart. Now select a shape within the org chart to add a new shape in relation to the selected shape, as shown in Figure 1, below.
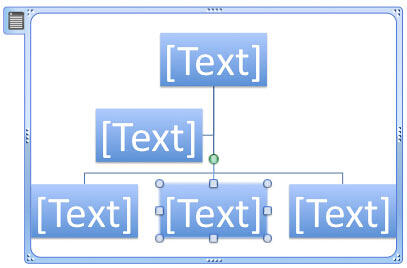
Figure 1: Shape selected within the Organization Chart - Right-click (or Ctrl + click) the selected shape to bring up a contextual menu. From this contextual menu, choose the Add Shape option, as shown in Figure 2, below. Doing so opens a sub-menu with five options to add a new shape, as shown in Figure 2.
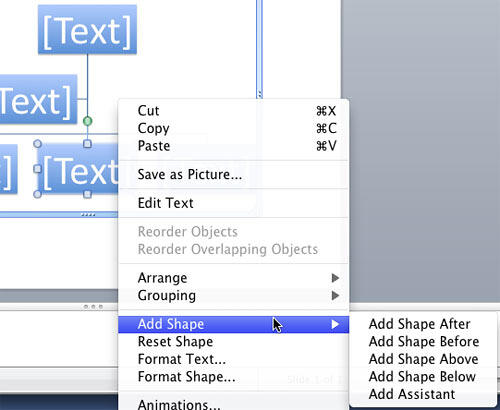
Figure 2: Add Shape sub-menu provides options to add a new shape to org charts - Depending on the original shape you selected, all options in the Add Shape sub-menu may not be available. For example, if you select the topmost shape in your org chart, you will find that the Add Shape Above option may be grayed.
- Add Shape sub-menu options are explained below:
Add Shape After
- To insert a shape at the same hierarchy level as the selected shape (to create an adjacent shape), click the Add Shape After option, as shown previously on this page in Figure 2. This option works best when you want to add another person at the same organizational level as the shape you selected. The new shape is placed to the right of the original shape, as shown in Figure 3, below.
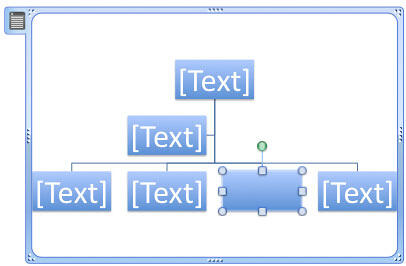
Figure 3: Shape added after the selected Shape Add Shape Before
- To insert a shape at the same hierarchy level as the selected shape (again creates another shape adjacent to the selected shape), click the Add Shape Before option, shown previously on this page in Figure 2. This option works best when you want to add another person at the same organizational level as the shape you selected. The new shape is placed to the left of the original shape, as shown in Figure 4, below.
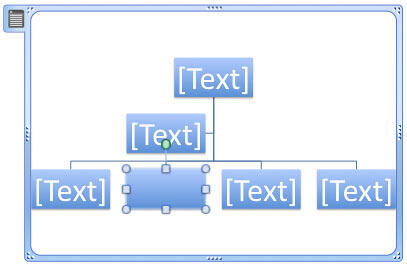
Figure 4: Shape added before the selected Shape Add Shape Above
- To insert a shape one hierarchy level above the selected shape, click the Add Shape Above option, shown previously on this page in Figure 2. This option adds the new shape in the position of the existing, selected shape. Also, the existing shape then moves down to a new hierarchy level, as shown in Figure 5, below.
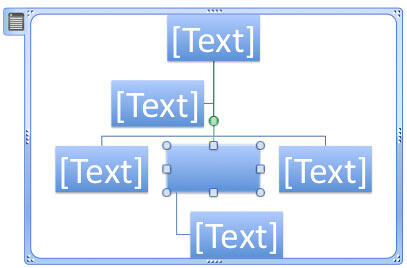
Figure 5: Shape added above the selected Shape Add Shape Below
- To insert a shape one hierarchy level below the selected shape, click the Add Shape Below option, shown previously on this page in Figure 2. This option adds a new shape in the hierarchy level below the selected shape. If a shape already existed in the hierarchy level below the selected shape, this option adds a new independent, hierarchy level, as shown in Figure 6, below.
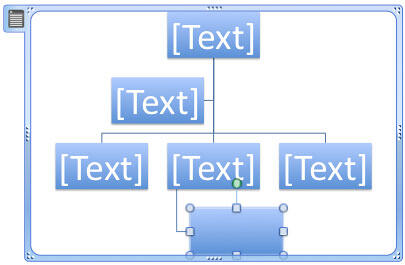
Figure 6: Shape added below the selected Shape Add Shape Assistant
- To place an assistant shape below the selected shape, select the Add Shape Assistant option as shown previously on this page in Figure 2. This option inserts a shape which is placed at an intermediate level, but lower than the selected shape, as shown in Figure 7, below. Do remember that the Assistant option has no real hierarchy level since these positions (such as a secretary) are often linked to the shape (such as the boss), for whom they are the assistants. So, a secretary to the Vice President of a company remains his or her secretary when the Vice President is promoted to become the President.
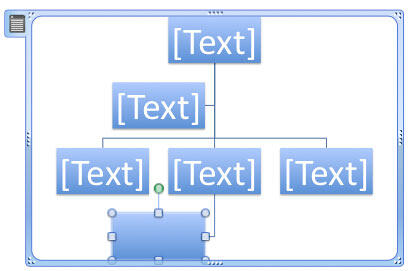
Figure 7: Shape added as Assistant of the selected Shape - Save your presentation.
Delete Shapes Within Organization Charts
To delete a shape within an org chart, select the shape you want to remove and press the Delete key on your keyboard.


