Do you want to create a flower diagram, or just draw a normal flower? You will soon realize that PowerPoint’s Shape Gallery offers no
Petal shape or even no Leaf shape. However, PowerPoint’s amazing
Merge Shapes tools allow you to create almost any
shape without having actually to draw anything. And they also allow you to create convincing Petal shapes.
We show you two ways to create a Petal shape in PowerPoint. The first way uses the
Merge Shapes' Union tool to create a tapered petal
whereas the second way uses the
Merge Shapes' Fragment tool to create a curved petal.
Tapered Petal
Here's how we created a tapered petal:
On a new slide, insert a Teardrop shape. Rotate the shape
and resize it larger, as shown in Figure 1.
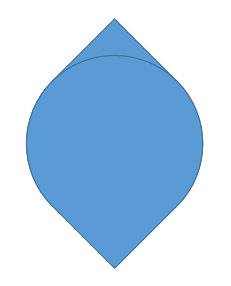
We then placed both shapes so that they overlapped each other to resemble a petal, as can be seen in Figure 3.
Figure 3: Teardrop shapes overlap each other
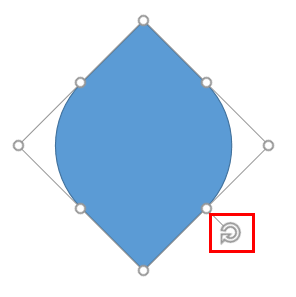
Select both shapes and apply the Shape Union option
to end up with the petal shape that you see in Figure 4. Do note that the selection handles are placed in a
diamond-shaped enclosure rather than a square-enclosure, and that the rotation handle is strangely placed at the bottom right, as
highlighted in red within Figure 4.
Figure 4: Shape Union option applied to Teardrop shapes
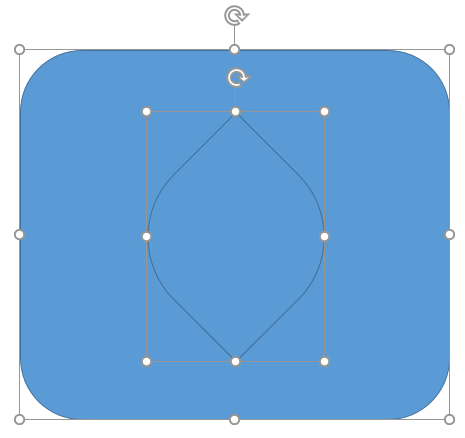
To correct this problem, insert any larger shape to overlap the petal. Now send this new shape back (see Figure 5).
Figure 5: Rounded Rectanlge shape inserted and placed behind the petal
Now select the larger shape first, and then Ctrl+click the petal shape to select. Then, apply the
Shape Fragment option to end up with the result
shown in Figure 6.
Figure 6: Shape Fragment option applied
Delete all extraneous areas other than the petal shape, and you will end up with a petal shape that has perfect selection handles and also
a rotation handle on the top, as highlighted in red within Figure 7 (compare with
Figure 4).
Figure 7: Tapered Petal shape ready
Curved Petal
Now let us create the curved petal shape:
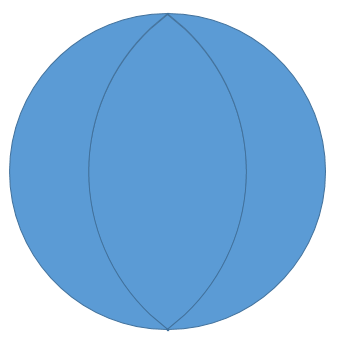
On a new slide, insert a Moon shape. Resize the shape
larger, as shown in Figure 8.
Figure 8: Moon shape on the slide
Duplicate the Moon shape, and
rotate the duplicated shape by 180 degrees. Place this duplicated shape next
to the original Moon shape and make sure it overlaps just a wee bit (see Figure 9).
Figure 9: Moon shape shape duplicated and rotated
Now select the original Moon shape first, and then Ctrl+click the second Moon shape to select. Now apply the
Shape Fragment option to end up with the result
shown in Figure 10.
Figure 10: Shape Fragment option applied
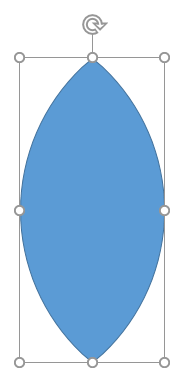
Delete all extraneous areas other than the petal shape, and you will end up with a petal shape that has perfect selection handles and
also a rotation handle on the top, as shown in Figure 11.
Figure 11: Curved Petal shape ready
PowerPoint Keyboard Shortcuts and Sequences:
PowerPoint 2016, 2013, 2011, 2010, 2007 and 2003 for Windows
PowerPoint 2016 and 2011 for Mac
PowerPoint Online for Windows and Mac
Have your ever used keyboard shortcuts and sequences in PowerPoint? Or are you a complete keyboard aficionado?
Do you want to learn about some new shortcuts? Or do you want to know if your favorite keyboard shortcuts are documented?